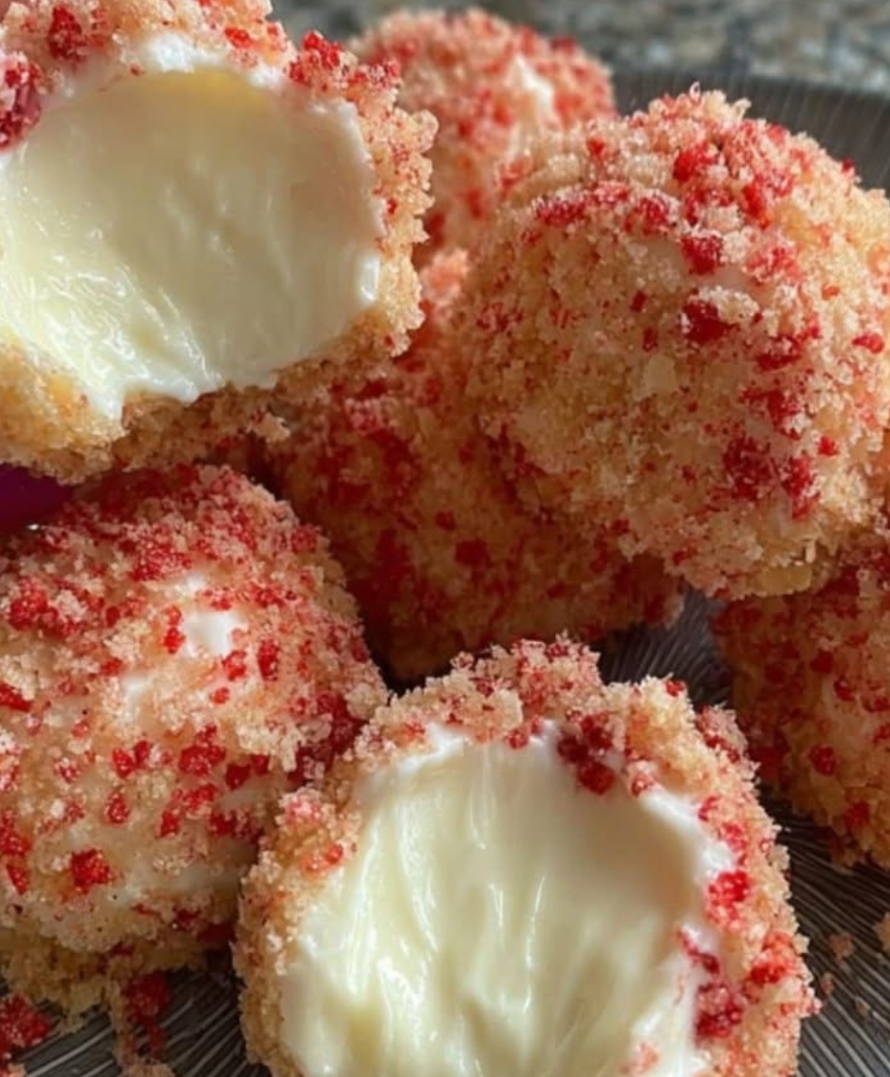
Perfect! 🍓✨ Strawberry Crunch Cheesecake Bites are indulgent little desserts with a perfect balance of creamy cheesecake, sweet strawberries, and a crunchy topping. They’re bite-sized delights that work beautifully for parties, potlucks, or just a special treat at home.
Here’s a long, detailed recipe with step-by-step instructions, tips, and variations so your cheesecake bites turn out irresistible.
🍓 Strawberry Crunch Cheesecake Bites Recipe
These cheesecake bites layer buttery graham cracker crust, creamy cheesecake filling, fresh strawberries, and a sweet crunchy topping. They’re easy to serve at gatherings and look beautiful on a dessert platter.
⭐ Ingredients (makes about 24 bites)
For the Crust:
- 1 ½ cups graham cracker crumbs (about 10 full sheets)
- ¼ cup granulated sugar
- 6 tablespoons unsalted butter, melted
For the Cheesecake Filling:
- 16 oz (2 packages) cream cheese, softened
- ¾ cup granulated sugar
- 1 teaspoon pure vanilla extract
- 2 large eggs
- 2/3 cup sour cream
For the Strawberry Topping:
- 2 cups fresh strawberries, hulled and sliced
- ¼ cup granulated sugar
- 1 teaspoon lemon juice
For the Crunchy Topping:
- ½ cup crushed graham crackers
- ¼ cup brown sugar
- 2 tablespoons unsalted butter, melted
- ¼ cup chopped pecans or almonds (optional)
🥘 Step-by-Step Instructions
Step 1: Prepare the Crust
- Preheat oven to 325°F (163°C).
- In a medium bowl, combine graham cracker crumbs, sugar, and melted butter.
- Press mixture evenly into the bottom of a lined 9×13 baking pan or muffin tin if making mini bites.
- Bake for 8–10 minutes until lightly golden. Remove from oven and cool.
Step 2: Make the Cheesecake Filling
- In a large mixing bowl, beat cream cheese with sugar until smooth and creamy (about 2–3 minutes).
- Beat in vanilla extract.
- Add eggs one at a time, mixing well after each.
- Mix in sour cream until smooth.
Step 3: Bake the Cheesecake Layer
- Pour cheesecake filling over cooled crust.
- Bake for 25–30 minutes until cheesecake is set but slightly jiggly in the center.
- Remove from oven and allow to cool completely, then refrigerate for at least 2–3 hours (or overnight for best texture).
Step 4: Prepare Strawberry Topping
- In a medium bowl, combine sliced strawberries, sugar, and lemon juice.
- Toss gently and let sit for 15–20 minutes to macerate (this softens berries and draws out juices).
Step 5: Make Crunchy Topping
- In a small bowl, mix crushed graham crackers, brown sugar, melted butter, and chopped nuts (if using).
- Set aside.
Step 6: Assemble the Cheesecake Bites
- Once cheesecake layer is chilled and firm, slice into squares or cut into bite-sized portions.
- Top each piece with a spoonful of macerated strawberries.
- Sprinkle generously with crunchy topping.
🍴 Serving Suggestions
- Serve chilled for the best texture and flavor.
- For extra elegance, drizzle with white or dark chocolate.
- Serve with whipped cream or a dollop of vanilla yogurt for a light touch.
- Great for dessert platters at parties, bridal showers, or baby showers.
🔑 Recipe Tips & Variations
- Mini Cheesecakes: Use a muffin tin lined with cupcake liners. Layer crust, cheesecake filling, strawberry topping, and crunch topping individually. Bake for 18–20 minutes.
- Frozen Version: Chill bites overnight for a cheesecake popsicle effect.
- Berry Mix: Add blueberries, raspberries, or blackberries with strawberries for a mixed-berry crunch cheesecake.
- Nut-Free Version: Omit nuts or replace with toasted coconut for extra crunch.
- Gluten-Free Option: Use gluten-free graham crackers or almond flour crust.
🕰 Storage & Make-Ahead
- Refrigerator: Store in an airtight container for up to 4 days.
- Freezer: Wrap individually and freeze for up to 1 month. Thaw in fridge before serving.
- Make-Ahead: Prepare crust and filling up to 2 days ahead and store refrigerated. Assemble toppings just before serving for best texture.
✅ These Strawberry Crunch Cheesecake Bites are creamy, fruity, and delightfully crunchy — a perfect balance of textures and flavors that make them irresistible.
If you want, I can also give you a no-bake version of this recipe that’s even quicker but still creamy, perfect for summer parties.